


OUTLINE:
A Comprehensive Guide of Canister Purge Valve Replacement
 206
206The canister purge valve, also referred to as the evaporative emission control (EVAP) purge valve, constitutes a crucial element within a vehicle's fuel vapor recovery system. Functioning as a gateway, it enables fuel vapor stored in the carbon canister to be redirected back into the engine's intake system for combustion. Once activated, the purge valve opens up, permitting the flow of fuel vapor from the carbon canister towards a vacuum source, typically the intake manifold. This procedure aids in reducing emissions and guarantees that fuel vapors are not discharged into the atmosphere.
In order to determine whether the canister purge valve of the car has a problem and needs to be replaced, you can consider the following aspects.
Failure code and warning light
If the vehicle's diagnostic system detects a problem with the purification valve, a fault code may be set and the engine failure light may be lit. For example, specific fault codes such as code P1468 (indicating a short circuit to the ground in the EVAP canisters cleaning valve) point directly to the problem with the cleaning valve. When such a situation occurs, it indicates that the purification valve is likely to fail and needs further inspection to determine whether it needs to be replaced.
Performance issues
The abnormal performance of the engine may mean that the purification valve is faulty. If the vehicle is hesitant to accelerate during driving, that is, the vehicle reacts slowly after stepping on the accelerator and cannot speed up in time, it may be that the abnormal operation of the purification valve affects the intake and combustion process of the engine.
If the engine has a rough idle state, such as obvious jitter, unstable speed, etc., it may also be a sign of problems with the purification valve. Because the failure of the purification valve may cause the fuel steam to not enter the engine normally for combustion, thus affecting the smooth operation of the engine.
Declining fuel efficiency is also an important indicator. When the purification valve does not work properly, it may lead to the imbalance of the mixing ratio of fuel and air, which reduces the combustion efficiency of the engine, resulting in an increase in vehicle fuel consumption.
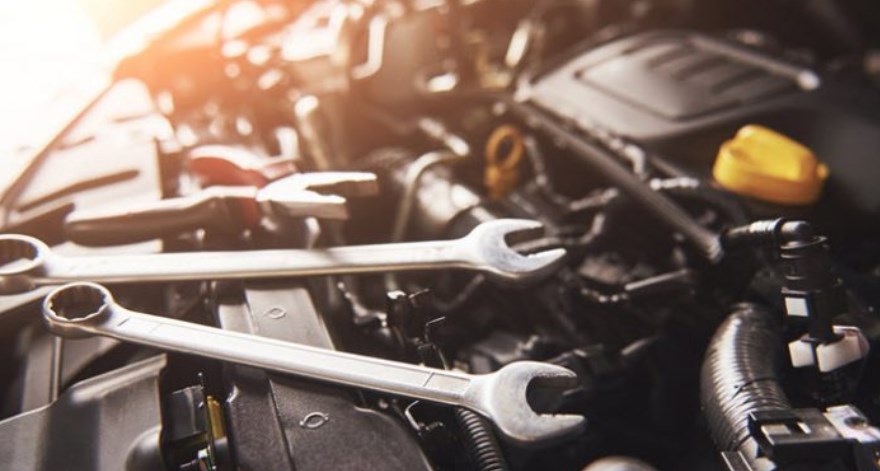
Tools and Equipment Needed For Canister Purge Valve Replacement
When replacing a canister purge valve, you will need a variety of tools to ensure the job is done efficiently and safely. Here is a list of essential tools:
|
General tools |
A complete set of screwdrivers (flat heads and crossheads), a set of wrenches (adjustable, pipe, box, and socket), and any specialized tools tailored to your vehicle model. |
|
Electrical tools |
If you need to disconnect and reconnect electrical connectors, you may need to use electrical wiring pliers or electrical tape. |
|
Additional tools |
A torque wrench for precise bolt tightening, ratchet and socket extensions for accessing tight spaces, needle-nose or locking pliers for gripping small parts, hex keys/Allen wrenches for securing electrical connectors, an O-ring pick for safe O-ring removal and installation, a fuel line disconnect tool for safely disconnecting fuel lines, and impact-resistant boots and a flashlight/headlamp for added protection and illumination. |
Pre-Work Inspection Of Canister Purge Valve Replacement
Before you are ready to replace the canister purge valve on your vehicle, a pre-work inspection needs to be done.
To begin with, ensure your safety. Before carrying out any automotive maintenance operation, make sure that the vehicle is in a safe state, such as parking on a flat and stable ground, pulling the handbrake, turning off the engine and waiting for it to cool down to prevent accidents.
Then, choose the right accessories. Purchase regular channels, reliable quality of canister purge valve, to ensure that it matches the vehicle model and can show the normal performance and reliability after installation.
Moreover, prepare required tools shown in the previous section, such as wrenches and screwdrivers, to facilitate the replacement.
And after all this preparation, confirm again that there is indeed a problem with the canister purge valve. You can locate the problem by checking the vehicle's fault code, whether the warning light is lit again, and observing the performance of the vehicle such as whether the acceleration is hesitant, whether the idle speed is rough, and whether the fuel efficiency is reduced.
After this, check whether the connection pipe is properly connected to the carbon tank purification valve. The wrong situation can be the valve is damaged, blocked or leaked. If there is a problem with the pipeline, it may be necessary to repair or replace it at the same time to ensure that the purification valve can work normally after replacement.
Furthermore, check whether the carbon tank itself is damaged or blocked. Because the carbon tank and the purification valve work together, if there is a problem with the carbon tank, it may affect the performance of the canister purge valve. You can check whether the appearance of the carbon tank is damaged, and whether the adsorption and desorption function of the carbon tank is normal through professional equipment.
And then look at the electrical connection. If the plug is loose, corroded or damaged, reconnect it to ensure that the electrical connection is normal to avoid electrical faults after replacement.
Last but not least, do not forget to check other related components such as the intake system, fuel system, etc., to see if there are problems that may affect the work of the purification valve. For example, check whether there is carbon accumulation in the inlet and whether the fuel filter needs to be replaced.
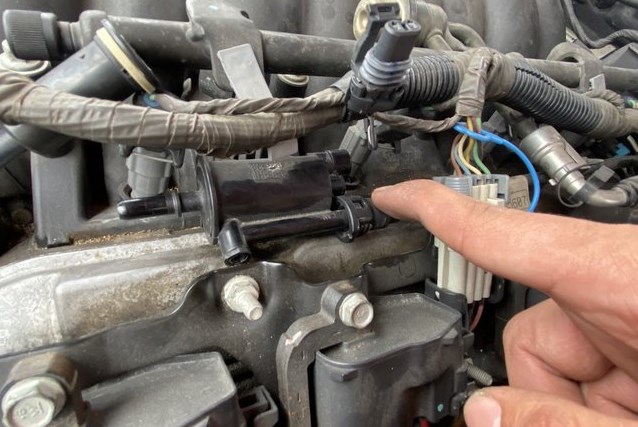
Removal of the Old Valve When Operating Canister Purge Valve Replacement
After identifying the appropriate component, adhere to the guidelines outlined in your service manual to disconnect the electrical harness, purge valve, and vacuum lines. Label the position of each vacuum line meticulously to prevent misinstallation, as experienced mechanics often emphasize.
To clearly identify which vacuum line corresponds to the proper fittings and their respective reinstallation points, employ colored masking tape or distinctively colored cable ties.
When you’ve found the vapor canister purge valve and have removed the harness and vacuum lines, you can now remove the valve. 10mm diameter bolts are commonly used to secure this component to a bracket found near the fuel injector rail or the firewall. Remove the old canister purge valve from the car by removing the bolt and setting it to the side.
Installation of the New Valve of Canister Purge Valve Replacement
The procedure for installing this component is the same as for removing it, simply put it back in reverse, then re-secure the valve with the bracket and bolt. Follow these broad recommendations, but always refer to your vehicle's service manual for precise instructions.
First, prepare the replacement valve and ensure you possess the correct canister purge valve for your vehicle model. Inspect the packaging for completeness and absence of damage.
Second, identify the installation site. You should locate the original mounting point for the valve within the engine compartment, typically adjacent to the fuel injection system or firewall.
Third, clean the mounting area. Prior to installing the new valve, thoroughly clean the mounting surface using a clean cloth or tissue to eliminate dust, grease, or other contaminants.
Fourth, remember to align and secure, which means you have to position the new canister purge valve correctly over the mounting point, ensuring all interfaces and attachment points are aligned. Utilize the appropriate tools (like a screwdriver or socket wrench) and the manufacturer-specified bolts or screws to firmly secure the valve in place.
Fifth, reconnect electrical and vacuum connections. For this key step, it is better to follow the service manual's instructions to operate the reconnection of the electrical harness and vacuum lines to the new valve. Confirm that each connection is tightly secured without any looseness. After the reconnection, verify it! Before continuing, conduct a thorough check of all connections to ascertain that the electrical harnesses and vacuum lines are properly installed and nothing is omitted.
Post-Installation Checks of Canister Purge Valve Replacement
Next, we go to the post-installation checks of canister purge valve replacement. The first step to check whether the installation is proper is to restart the vehicle by reconnecting the battery cables. If you have a scanning tool, use it to remove incorrect codes. Warm up the car by starting it and make sure under the operating temperature, the engine light will no longer light up on the dashboard.
If your check engine light is still lit, you should turn off the car and run a diagnostic scan. Turn the vehicle back off and remove the gas cap after confirming that the Check Engine or other lights have gone out.
This test will ensure that the suction is operating correctly. If there is a lot of vacuum pressure when you remove the gas cap, double-check the lines you connected to the vapor canister purge valve in case they become crossed when replacing the valve.
Final Verdict
Hope you can successfully address potential issues affecting performance and emissions control and replace your car's canister purge valve by following this step-by-step guide. If you encounter any difficulties or require further assistance, don't hesitate to consult a professional mechanic for expert support and guidance.
Disclaimer: The views and opinions expressed by individual authors or forum participants on this website do not represent the views and opinions of Chipsmall, nor do they represent Chipsmall's official policy.

share this blog to: