OUTLINE:
How to Crimp Bullet Connectors in 5 Steps: A Comprehensive Guide
 101
101Crimping bullet connectors is a crucial skill for anyone working with electrical connections. Whether in automotive, marine, or electronics applications, mastering the process ensures reliable and secure connections. In this comprehensive guide, we will walk you through the steps of how to crimp bullet connectors effectively.
Introduction to Bullet Connectors
Bullet connectors are versatile electrical connectors that find applications in various industries. Let's explore what bullet connectors are and where they are used first.
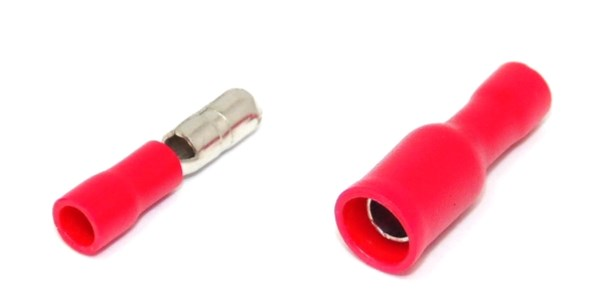
1. What is a Bullet Connector
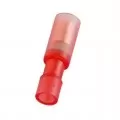
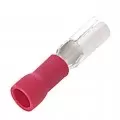
A bullet connector, also known as a barrel connector, is a simple single-conductor solution designed to provide quick and reliable wire connections. The receptacle (socket) is a circular, hollow tube and the plug is a pin with a rounded end to easily connect with the female connector.

2. Applications of Bullet Connectors
A bullet connector, also known as a barrel connector, is a simple single-conductor solution designed to provide quick and reliable wire connections. The receptacle (socket) is a circular, hollow tube and the plug is a pin with a rounded end to easily connect with the female connector.
Tools Needed for Crimping Bullet Connectors
Crimping bullet connectors requires specific tools to ensure proper and secure connections. In this section, we will discuss the essential tools needed for crimping bullet connectors.
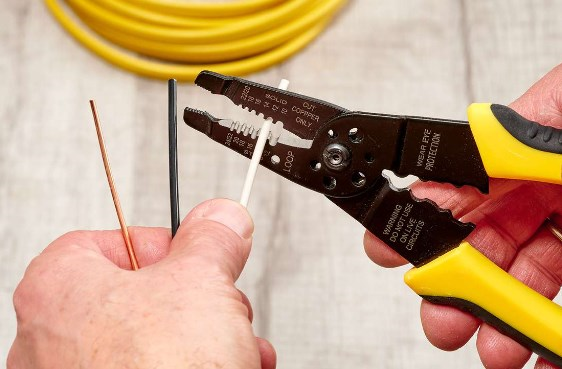
1. Wire Stripper
Wire strippers are essential for removing the insulation from the end of the wire. They allow you to expose the bare wire, ensuring a proper connection with the bullet connector.
2. Crimping Tool
A crimping tool is the primary tool required for crimping bullet connectors. It is designed to compress the metal sleeve of the connector onto the wire, creating a secure connection. Choose a crimping tool specifically designed for bullet connectors to ensure accurate and consistent crimps.
3. Heat Shrink Tubing
Heat shrink tubing can be used to provide additional insulation and protection to the crimped connection. It is placed over the crimped area and then heated to shrink and form a tight seal around the connection.
How to Crimp Bullet Connectors in 5 Steps
Mastering the art of crimping bullet connectors is crucial for achieving reliable and secure electrical connections. Follow these five simple steps to ensure a successful crimping process:
Step 1: Prepare the Wire
Before crimping, it's important to prepare the wire properly. Start by cutting the wire to the desired length using wire cutters. Ensure that any outer sheathing or additional layers of insulation are removed, exposing the bare wire.
Step 2: Strip the Wire
Using a wire stripper, carefully remove a small portion of insulation from the end of the wire. The wire stripper should have a cutting blade that matches the wire gauge. Place the wire into the appropriate notch on the wire stripper, squeeze the handles firmly, and pull the insulation away from the wire end. Be cautious not to damage the wire strands during this process.
Step 3: Insert the Wire into the Connector
Take the stripped wire end and insert it into the appropriate bullet connector. Ensure that the wire goes as far as possible into the connector without crossing any insulation barriers. The wire should make solid contact with the connector's conducting surface. The length of wire inserted into the connector should be sufficient to create a secure connection.
Step 4: Crimp the Connector
Position the bullet connector in the crimping tool's appropriate slot. The crimping tool should have a dedicated slot for the size of the bullet connector being used. Insert the connector and wire into the slot, making sure the connector is seated properly. Squeeze the handles of the crimping tool firmly to compress the connector onto the wire. Apply enough pressure to create a secure and tight crimp, ensuring excellent conductivity and mechanical strength. Avoid over-crimping, as this can damage the wire strands or cause the connector to deform.
Step 5: Apply Heat Shrink Tubing
To provide insulation and protection to the crimped connection, slide a piece of heat shrink tubing over the crimped area. Ensure that the tubing is long enough to cover the entire crimped section of the connector. Position the tubing over the connection and use a heat gun to evenly apply heat to the tubing. The heat will cause the tubing to shrink and create a tight seal around the connector and wire, providing insulation and protection against moisture and other environmental factors. Move the heat gun in a circular motion to prevent overheating or melting of the tubing.
Troubleshooting Common Issues with Bullet Connectors
Even with proper crimping, issues can arise. Here are two common problems and their solutions:
Issue 1: Loose Connection
If the connection feels loose or unreliable, ensure that the wire is fully inserted into the bullet connector and that the crimping tool applies enough pressure during the crimping process.
Issue 2: Corroded Connector
If you encounter corrosion on the connector, inspect it for signs of damage or exposure to moisture. Replace the connector if necessary and ensure proper sealing with heat shrink tubing.
Spade Terminals vs Bullet Terminals: Which is better
Spade terminals are superior solutions for equipment and wiring that require frequent connections and disconnections. They are far more commonly used, therefore most appliances are compatible with them.
However, there are some appliances and equipment that require bullet terminals, such as vintage autos. You may surely replace the bullet terminal connectors with spade and blade ones. However, this can be time-consuming and damaging to the circuitry. In these circumstances, you should utilize bullet terminals. This ensures that the circuitry remains intact and functions properly.
Final Verdict
Knowing how to crimp bullet connectors is a straightforward process that allows for secure and removable electrical connections. By following the step-by-step guide, using the appropriate tools, and taking necessary safety precautions, you can achieve reliable connections for your automotive, marine, or electronics projects.
Disclaimer: The views and opinions expressed by individual authors or forum participants on this website do not represent the views and opinions of Chipsmall, nor do they represent Chipsmall's official policy.

share this blog to: