OUTLINE:
For Beginners: How to Wire A 4 Way Switch
 172
172Hey, have you ever thought about being able to control a light from multiple places at home? Sounds pretty cool, right?
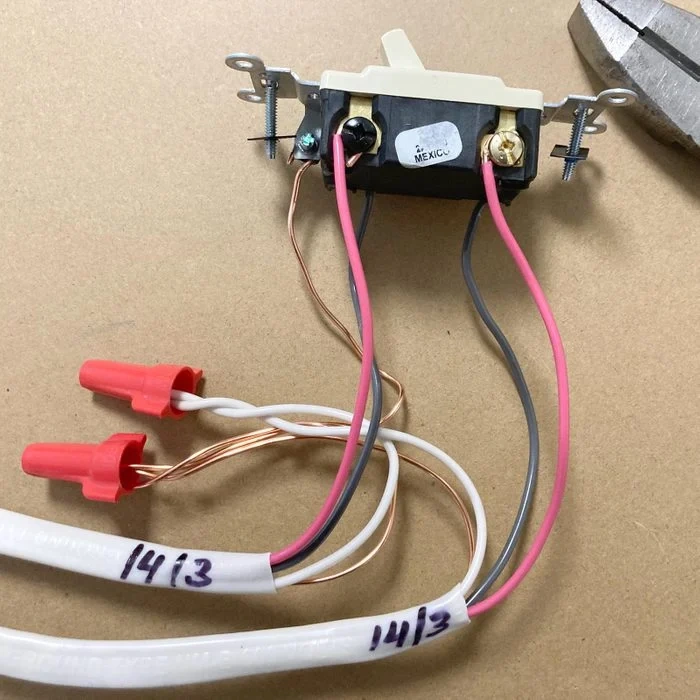
Image Source: Family handyman
Actually, installing a four-way switch may seem a bit difficult at first, but as long as someone explains it clearly to you, any friend who likes to do it themselves can handle it! If you want to control a lamp from three or more places, learning to wire four-way switches is a must. Don't worry, my super simple guide will teach you step by step how to do it, ensuring that you do it quickly and well, with full confidence!
What Is A 4-Way Switch [Quick Answer]
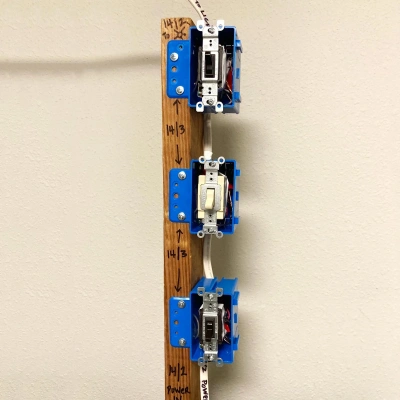
Image Source:Family Handyman
Hey, do you know what a 4-way switch is? It is a specialized electrical switch that can control a lamp or a group of lamps from three or more places. It usually needs to be used together with two three-way switches to build a multi-point lighting control system. How does the 4-way switch work? It is the ability to transfer current between multiple circuits, allowing you to easily turn on and off lights at different locations in your home or space. This type of setting is particularly common in large rooms, corridors, or stairwells, making it more convenient and convenient to use.
The Function of A 4-Way Switch in A Lighting Circuit
That four-way switch is really a clever little one in the lighting area. It allows you to control a light or a group of lights in several places, turning them on and off as you want. Isn't it amazing?
It's like a small guide for electric current, taking it to where it should go according to your instructions. In this way, you can easily turn on and off the lights in every corner of the room. This function is particularly practical in stairwells, corridors, or large rooms, without having to run around turning on and off lights, how worry free it is!
So how does this little clever guy work? It has four 'small interfaces', two for power in and two for power out. It does not directly interact with the lamp, but works seamlessly with two three-way switches. With a gentle flick, it can change the direction of the current, connect or disconnect the circuit, and the light will turn on or off.
Moreover, this clever little guy can also control the lights from multiple places. A regular 3-way switch can only support two control points, but a 4-way switch allows you to control the lights from three or more places at will. It's really convenient!
Also, in some places, such as stairwells, corridors, or large rooms, lights can be turned on and off from multiple locations, which is safer and more convenient. For example, if you are walking in the hallway, you can turn on the lights from one end and then turn them off from the other end. Isn't it very convenient?
Moreover, this clever little ghost is particularly flexible. You can add several 4-way switches on top of it as needed to form a control network and add more control points. In this way, you can easily turn on and off the lights in more places.
Most importantly, it can also help you save energy!
What Tools Are Required to Wire A 4 Way Switch
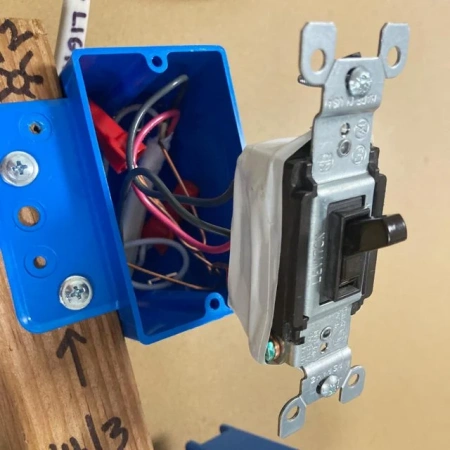
Image Source: Family Handyman
To successfully learn how to wire a 4 way switch, you'll need a set of essential tools to ensure a smooth and safe process. These tools will help you strip wires, make secure connections, and properly mount the switches. Here's what you'll need:
Screwdriver Set: A flathead and Phillips screwdriver are essential for removing switch plates and securing the 4-way switch in place.
Wire Strippers: Used to remove the insulation from the ends of the wires without damaging them.
Voltage Tester: Ensures the circuit is powered off before working to prevent electrical shocks.
Electrical Tape: Provides insulation and secures wire connections.
Wire Nuts or Connectors: Used to safely join wires together.
Needle-Nose Pliers: Helps in bending or shaping wires for secure connections.
Cable Cutters: For cutting wires to the desired length.
Multimeter (Optional): Useful for checking continuity and ensuring proper connections.
Tips on Wiring 4 Way Switch [In Detailed]
When learning how to wiring 4 way switches, it’s important to follow detailed steps and use best practices to ensure safety and functionality. Here are some essential tips to help you wire a 4-way switch correctly:
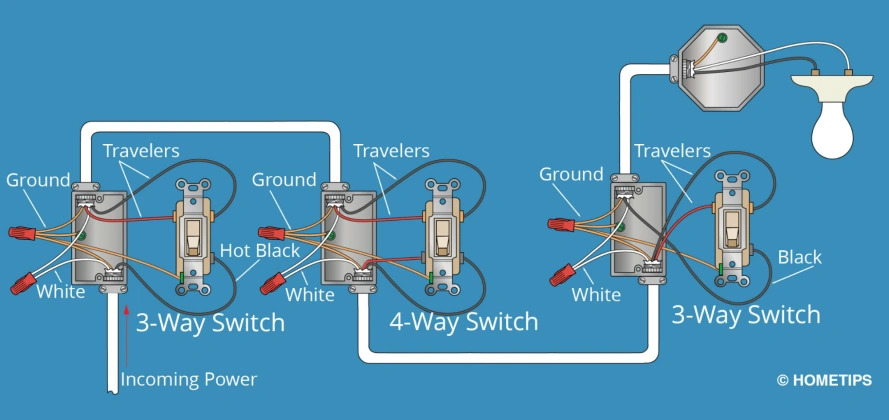
Image Source:Hometips
1. Power off first
Before starting, turn off the circuit switch to avoid electric shock. Don't forget to use a voltage tester to confirm if the circuit is really dead.
2. Clarify the wiring components
The 4-channel switch has four connectors: two incoming lines (connected to the first 3-channel switch) and two outgoing lines (connected to the second 3-channel switch). It does not directly turn off the lights, but passes current between two three-way switches.
Three switches are placed at both ends of the circuit, and four switches are placed in the middle.
3. Choose the right wire specifications
Wiring should use wires of the correct specifications (usually 14 or 12 wires are used at home). The wire must be able to withstand the current of your circuit.
The black wire is the live wire, the white wire is the neutral wire, and the green wire or bare wire is the ground wire.
4. Connect three switches first
Start by connecting the 3-way switches on both sides of the 4-way switch. The common connector of each 3-way switch is connected to the live wire, and the travel connector is connected to the travel wire.
5. Connect the two 3-way switches, then connect the 4-way switch
Connect the travel line to the 4-way switch
Connect the two travel wires from the 3-way switch to the incoming connector on the 4-way switch. These two lines are responsible for transmitting current from the 3-channel switch to the 4-channel switch.
Connect the output connector of the 4-way switch to the travel line leading to the next 3-way switch.
6. Check the wiring
Ensure that all wires are tightly connected to the connectors, especially the travel wires on the 4-way switch, which can sometimes be a bit tricky.
Secure the connector with a wire cap to ensure that there are no exposed wires to prevent short circuits or electric shock.
7. ground wire
Each switch must be properly grounded by connecting the ground wire to the grounding screw on the switch. Grounding is very important, safety comes first, and it can also prevent electric shock.
8. Mark the wires
When learning to install a four-way switch, label each wire with masking tape or colored electrical tape. This way, it's better to know where to connect each line, especially when connecting multiple switches.
9. Test circuit
Once it's connected, try powering it on and the switch should be able to control the light from each position. Press the switch several times to ensure that the current flows correctly and the light responds as expected.
10. Use a multimeter (optional)
If you have a multimeter, you can measure the connectivity and check the voltage of each switch to ensure that it is connected correctly.
11. Fixed switches and panels
After confirming that the wiring is correct, fix the switch into the box and install the panel. Ensure that everything is securely installed and there are no exposed wires.
Safety Precautions when Wiring a 4-way Switch
When learning how to wire a 4 way switch, key safety precautions include:
Turn Off the Power: Always switch off the circuit breaker and verify with a voltage tester to ensure no live current.
Use the Right Tools: Use insulated tools, like screwdrivers and pliers, to reduce the risk of electric shock.
Double-Check Connections: Ensure all wires are securely connected to prevent shorts or sparks.
Ground the Switches: Properly ground the 4-way and 3-way switches to avoid electrical hazards.
Follow Wiring Instructions: Refer to wiring diagrams and manufacturer instructions to ensure correct setup.
Check for Overloaded Circuits: Make sure the circuit is rated for the wattage of the connected light(s).
Final Verdict
Understanding how to wire a 4 way switch allows you to control lights from multiple locations with ease. By following the proper steps and safety precautions, you can successfully complete your wiring project and enhance your electrical skills. Whether you're a beginner or looking to improve your DIY capabilities, mastering this technique is a valuable addition to your home improvement toolkit.

Disclaimer: The views and opinions expressed by individual authors or forum participants on this website do not represent the views and opinions of Chipsmall, nor do they represent Chipsmall's official policy.

share this blog to:


