OUTLINE:
Comprehensive Guide: Coolant Pump Replacement
 144
144The appropriate engine temperature is essential to fuel efficiency, reducing wear and extending engine life. If the coolant pump fails to work, the coolant circulation will be blocked, and the engine temperature will then rise quickly, leading to thermal expansion and wear of the piston, cylinder wall, valve, and even cause serious failures such as engine cylinder pulling and tile holding. Therefore, understanding when we should and how to do the coolant pump replacement is crucial.

What is a Coolant Pump
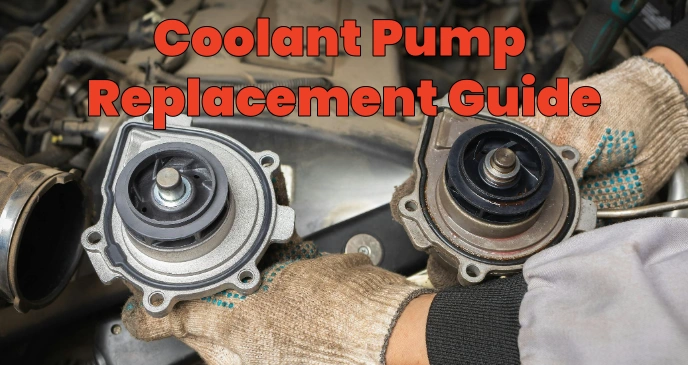
Coolant pump, also known as water pump, is one of the core components in an automotive cooling system, which mainly functions to circulate the coolant (usually a mixture of water and antifreeze). It rotates through a belt driven by the engine crankshaft pulley or camshaft, which pulls the coolant out of the radiator, pressurizes it and delivers it to the engine block, head and water jacket. And the coolant will absorb heat as it circulates inside the engine and is then dissipated through the radiator, thereby maintaining the engine within a suitable operating temperature range.
This timely cycle ensures the engine or other components operate within the appropriate temperature range. For example, in an automotive engine, the combustion process usually generates a mess of heat. During long-time driving, the engine will easily overheat without a coolant pump to effectively circulate the coolant, resulting in serious damages, such as dead piston or cylinder deformation.
When the coolant pump fails, the coolant circulation is blocked or stopped, which can cause the temperature of the engine or related equipment to rise rapidly. In the car, there may be water temperature warning lights on the dashboard, vehicle power drops, and even engine jitters. If the system continues to operate, it may eventually lead to complete engine damage.
When a Coolant Pump Replacement is Needed
So how to judge whether a coolant pump replacement is needed? The following four situations require your special attention.
First, a leak around the coolant pump is a common sign that it needs to be replaced. This is commonly due to seal wear and pump body rupture. If the leaking coolant is not properly treated in time, on the one hand, it will lead to insufficient coolant in the system, affecting the cooling effect; On the other hand, the coolant may corrode other components while driving, such as the electrical wiring of the engine.
Second, if the engine temperature is too high, and the inspection rules out the problem of other cooling system components (such as blocked radiator, thermostat failure, etc.), then the coolant pump may be the culprit. As the coolant pump cannot circulate the coolant properly, the heat is not effectively dissipated, which causes the temperature to rise.
Third, when the coolant pump is running, it makes abnormal noises, such as buzzing, rattling or harsh friction, which usually indicates that there is a problem with the parts inside the pump, such as the impeller and bearings. The impeller may be worn, deformed, or the bearing may lack lubrication or be damaged. If these problems are not solved in time, they will be further aggravated and eventually lead to complete failure of the coolant pump.
Fourth, over time, the performance of the coolant pump may gradually decline. For example, it may not generate enough pressure to push the coolant through the system, which can be detected with some professional test equipment. When it is found that the flow of coolant is significantly reduced or that the cooling effect is not as good as before under the same operating conditions, it is necessary to consider the coolant pump replacement.

Preparation before Coolant Pump Replacement
In order to successfully conduct coolant pump replacement, we need to firstly prepare the right tools, components, and pay attention to safety protection to avoid accidents. For instance, it is recommended to wear protective gloves to prevent the coolant from touching the skin. If you work in an environment with dust or debris, it is necessary to wear safety goggles.
Preparation for tools
|
List of tools for coolant pump replacement |
|
|
Wrenches |
Wrenches of different sizes are essential for removing and installing the bolts on the coolant pump. For example, for automotive coolant pumps, an 8 to 19 mm open end wrench or socket wrench is usually required. |
|
Screwdriver |
A flat-head or cross screwdriver is needed to remove some auxiliary parts, such as the screw on the pump cover or the fastening screw on the wire connector. |
|
Sealant |
When installing a new coolant pump, it is necessary to use sealant to ensure the tightness of the joints and prevent coolant leakage. |
|
Other tools |
Pliers, pulleys (used to remove some difficult-to-remove parts), a clean cloth or sandpaper. |
Preparation for new components
|
List of new components for coolant pump replacement |
|
|
New coolant pump |
When choosing a new coolant pump, make sure it matches the specification of the original pump, including pump flow, pressure and installation size. Different car models or engine types may require different coolant pumps. |
|
New seals |
If the old seals cannot be reused, new seals need to be prepared, such as O-rings or sealing gaskets. |
|
Coolant |
After replacing the coolant pump, the coolant needs to be replenished. Choose the proper type of coolant according to the requirements of the vehicle. |
Step-by-step guide: how to do coolant pump replacement
Coolant pump replacement usually involves removing the old pump, installing a new one instead, and then refilling the coolant. The following steps are simplified for your reference.
Firstly, find out the vehicle's coolant drain plug, usually located at the bottom of the radiator or on the side of the engine block. After orientating the radiator drain valve or removing the radiator downpipe, open the drain plug, and drain the coolant into a suitable container. This process requires attention to the temperature of the coolant to avoid burns.
Secondly, use a wrench to loosen the belt tensioner, remove the belt, and then use a tool such as a puller to remove the pulley on the coolant pump. Then it is time for removing the fixing screws and connection lines around the coolant pump. Protect surrounding components from damage during disassembly. There are usually 3 to 6 bolts on the coolant pump. During this process, pay attention to the preservation of bolts to avoid loss.
Thirdly, after removing the old pump, check for damaged or worn parts that need to be replaced. Clean the mounting surface of the coolant pump on the engine block with a clean cloth or sandpaper to ensure that the surface is clean and flat, free of old sealant, debris and oil stains.
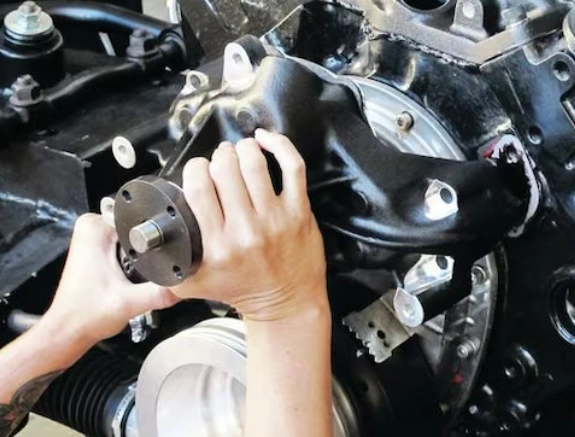
Fourthly, apply some sealant to the sealing surface of the new coolant pump. Install the new pump correctly to the engine in the original position. At the same time, take care to use sealing gaskets to ensure tightness between the pump body and surrounding components. And ensure that all fixing screws are tightened in place to avoid loosening or leakage.
Fifthly, install the pulley to the new coolant pump, tighten the nut using a wrench, then install the belt and adjust the tension of the belt. Close the coolant drain plug and refill the coolant into the radiator. Slowly refill the coolant until the appropriate level is reached. Take care to avoid mixing air into the cooling system.
So far, the coolant replacement steps have been successfully completed. Then it is time for testing. Start the engine now and observe whether the coolant flows out of the radiator normally and whether there is leakage. At the same time, pay attention to the sound of the engine to ensure that the coolant pump runs smoothly. In addition, remember to check the radiator fan, the circulation speed and temperature of the coolant.
Precautions for Coolant Pump Replacement
During the first period of time after the coolant pump is replaced, the cooling system should be checked frequently for any coolant leakage. It can be determined by observing whether there is cooling drop leakage around the coolant pump or at the pipe connection.
Besides, continuously monitor the temperature of the equipment or vehicle to ensure that the coolant pump is working properly and the temperature is kept within the normal range. This can be done using a temperature sensor or a water temperature gauge on the vehicle's dashboard.
Final Verdict
Timely coolant pump replacement ensures the normal operation of the cooling system, extends the service life of the vehicle, and avoids further losses and damages. Hope this guide can help you

Disclaimer: The views and opinions expressed by individual authors or forum participants on this website do not represent the views and opinions of Chipsmall, nor do they represent Chipsmall's official policy.

share this blog to:

