


OUTLINE:
Electronic Components Checking for What
 309
309Assume you're building your dream robot, soldering circuits with care. When the time comes, you flip the switch... and nothing occurs. You get a sinking feeling - might it be a faulty component?
Here's why electronic components checking is so important. It's not just about avoiding frustrating dead ends; it's about ensuring quality, safety, and ultimately, the success of your electronic project.

Introduction to Quality Control in Electronics Components
Quality control in electronics begins with stringent testing techniques for individual components throughout the production stage. Even the greatest procedures, however, cannot ensure that every single component is faultless. As a result, your own independent checking is critical to the success of your project.
Checking components weeds out the duds, preventing defective units from sabotaging your entire circuit.
What's more, Identifying and replacing faulty components early on is far cheaper than fixing or replacing the entire finished product later.
What are the Criteria for Testing Electronic Components
Testing electronic components involves checking their functionality and electrical specs (voltage, resistance, etc.) against their datasheet. We also consider how they handle stress, temperature changes, and potential failures like short circuits. The type of component (resistor, capacitor, etc.) determines the specific tests performed.
When to Test Electronic Components
Electronic components should be checked at several phases, including purchase, receiving, assembly, and final manufacturing. Each level of testing aids in the identification of faulty or damaged components, ensuring that only high-quality components are utilized in electronic equipment.
3 Common Electronic Components Checking Methods
Here are some practical methods you can use to check your electronic components:
Visual Inspection
It is a quick and initial assessment to identify obvious issues.
Visual inspection involves examining components for physical defects such as cracks, corrosion, bent pins, or incorrect markings. Check for proper soldering joints - no loose connections or solder bridges.
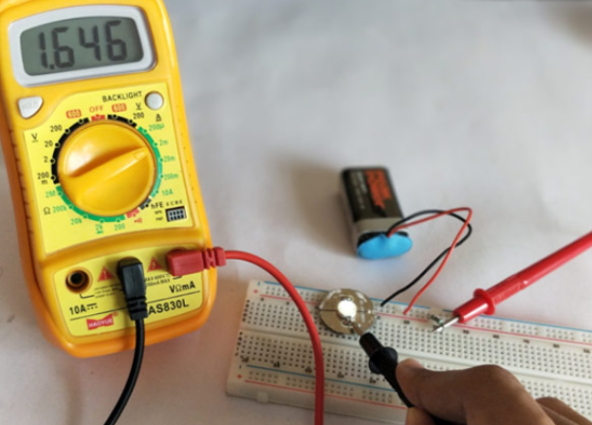
Multimeter
Multimeter testing is particularly useful for resistors, capacitors, and diodes.
This handy tool can measure various electrical properties of components like voltage, resistance, and continuity.
Compare your measurements to the component's specifications to ensure they're within the acceptable range.
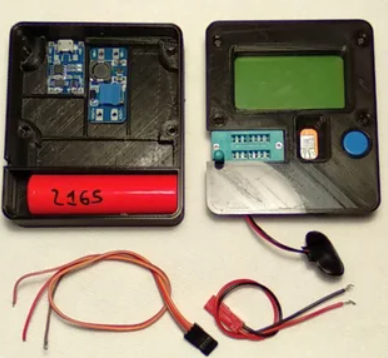
Component Tester
Component testers are especially helpful for advanced projects or when dealing with rare or unfamiliar components. Dedicated component testers provide more in-depth analysis of specific components, like transistors and integrated circuits. They can test for functionality, gain, leakage current, and other parameters.
Example of Electronic Components Checking
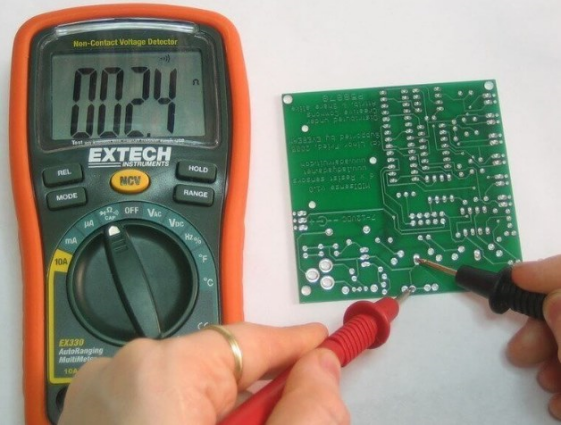
Let's take a practical example of how to check electronic components using a multimeter to test if there is a short circuit.
Preparation:When working with a multimeter to identify a short circuit, it is crucial to prioritize safety and take necessary precautions. Before proceeding, ensure that the electrical circuit is completely turned off, including removing batteries and power adapters. This prevents any potential damage to the circuit or the multimeter during the process.
Step 1: Turn on the multimeter and set it to either the continuity or resistance mode, depending on the available options. It is recommended to choose the lowest possible resistance scale for accurate readings.
Step 2: Identify and locate the specific circuit component that needs to be tested for a short circuit. It is important to select components that have some resistance, as finding a short circuit becomes challenging otherwise.
Step 3: Apply the red and black probe tips of the multimeter to the circuit. The black probe should be connected to the ground or chassis of the electrical circuit, while the red probe is connected to the component being tested. Both probes should make contact with a metal part, such as a wire, component lead, or circuit board foil.
Step 4: Check the display of the multimeter to observe the reading. In the resistance mode, a value of 1 or OL indicates the presence of a short circuit in the circuit being tested. In the continuity mode, a reading of 0 or close to 0 indicates a short circuit.
Conclusion
Remember, electronic components checking is a crucial step in any successful project. Electronic component checking is essential to ensure the quality and functionality of electronic devices. Regular and comprehensive component checking contributes to the overall reliability, performance, and longevity of electronic devices.
Disclaimer: The views and opinions expressed by individual authors or forum participants on this website do not represent the views and opinions of Chipsmall, nor do they represent Chipsmall's official policy.

share this blog to: