OUTLINE:
Quick Tutorial: How To Make A Homemade Flashlight
 158
158Welcome to the quick tutorial of how to create a unique and practical homemade flashlight! Whether you are an electronics enthusiast or a craftsman, this will be a fun and fulfilling project. In the next sections, we will guide you through the preparation, production and maintenance process of this flashlight, like a beam of your own light in the dark. Let's start now!
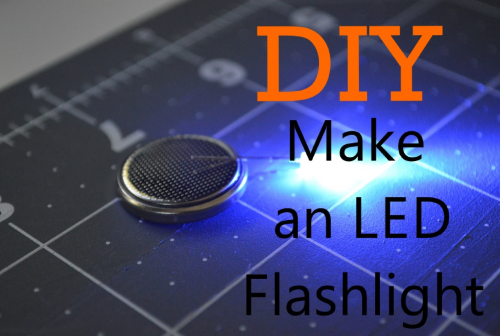
Image Source: Everyday Ready
Required Materials For Homemade Flashlight
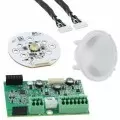
A flashlight is composed of a battery, a circuit, a switch, and a light bulb. They are correctly connected in the circuit to realize the function of supplying power to the light bulb for lighting. The working principle of a flashlight is that when the flashlight switch is turned on or pressed, the circuit switch is connected, and the battery starts to supply power to the light bulb. The light bulb is illuminated by the current and lights up. Flashlights are a common lighting tool for most people today. They have a simple structure and are easy to use. They are widely used in daily life, work, outdoor activities and other fields.
Your list of required materials is simple, and most of these things can be purchased at your local dollar store, or you probably have them around the house already.
- LED light, preferably 2.2 V
- Wire, preferably copper
- Battery
- Plastic pipe, aluminum can or toilet paper roll
- Glue or packaging tape
- Switch
- Reflector (can be made of aluminum foil)
- Brackets or fixtures
Detailed Steps To Create A Homemade Flashlight
Make a flashlight case
It is recommended to use plastic tubes or aluminum cans as the case for your homemade flashlight. As for applying a plastic pipe, you need to cut it out for a suitable length and an opening at one end for installing the LED light. If using aluminum cans, you can use the open end of the can directly. Last but not least, you can use toilet paper rolls or other lightweight cardboard as the shell for your flashlight.
Install LED lights
Install the LED lights at the previously-prepared open end to ensure that the LED lights are securely fixed.
.webp)
Make a reflector
The reflector can focus the light of the LED lamp in one direction, thus improving the lighting efficiency. For this, it is wise to make a simple reflector using aluminum foil by folding the foil into a hemisphere shape and attaching it to the back of the LED light.
Connect the circuit
Make sure that the battery, switch and LED light are connected through the wire to form a complete circuit. The positive electrode of the battery is connected to the long foot of the LED light, the negative electrode is attached to one end of the switch, and the other end of the switch is connected to the short foot of the LED light.
Install the switch and test
Install the switch on the shell of the flashlight for easy operation. Then turn on the switch to test whether the flashlight works normally.
These are the basic steps to make a simple homemade flashlight, and you can adjust the procedure according to the actual situation. Pay attention to your safety during operation to avoid electric shock.
Cost Analysis
1. Power supply: To control the cost, lithium batteries are not recommended. The batteries replaced from power-consuming devices generally have relatively more remaining power, slightly larger internal resistance, and higher electromotive force (higher ones can be as high as 1.3 V), which can fully power low-power devices.
2. Light-emitting device: Something that can emit light, with lower power and lower cost, can only be LED. To further control the cost, use LEDs removed from old LED light boards.
Tips For The Making Procedure Of Homemade Flashlight
In the process of making a homemade flashlight, pay attention to the following points:
Material selection
Select batteries and bulbs in good quality to ensure the service life and use effect of the homemade flashlight. At the same time, the material of the shell should also be selected as wear-resistant and sturdy to strengthen the durability of the flashlight.
Circuit connection
When connecting the battery and the wire, be sure to pay attention to the positive and negative electrodes of the battery, and the correct connection is that the positive electrode (+) of the battery is connected to one end of the wire, and the negative electrode (-) is connected to the other end of the wire. Ensure all connections are strong and reliable to prevent circuit breakage.
Maintenance
During practical use, it is necessary to regularly check the working status of the homemade flashlight, and replace the battery and bulb in time, maintaining the good performance of the flashlight.
Environmental protection
In the process of making homemade flashlights, it is better to choose recyclables, such as waste cans, etc., which not only saves resources, but also reduces environmental pollution.
These are some tips that need to be paid attention to when making a homemade flashlight, hoping it works for you. If you want to learn more about this funny DIY project, you can refer to some popular online videos to get in-depth knowledge of homemade flashlights.
Final Verdict
Congratulations on your successful homemade flashlight making project! Now you have a one-of-a-kind flashlight that can not only provide lighting at night, but also become a small tool for you to show your personality and creativity. I hope this project will stimulate your passion for DIY and allow you to try more interesting handmade projects in the days to come. Thank you for your participation and support.
Disclaimer: The views and opinions expressed by individual authors or forum participants on this website do not represent the views and opinions of Chipsmall, nor do they represent Chipsmall's official policy.

share this blog to: