OUTLINE:
How to Crimp a Butt Splice in 5 Steps
 489
489Master the art of crimping butt splices for unbreakable electrical connections. Explore the world of butt connectors, their applications, and uncover the essential tools and steps needed to achieve flawless crimps. Say goodbye to loose connections and overheating issues for good. Safety precautions included!
Introduction to Butt Splices
Discover the secret to secure and durable electrical connections. Uncover the power of butt splices as we delve into their applications, benefits, proper crimping techniques, and essential safety considerations.

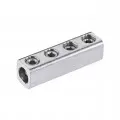
Image Source: Home Depot
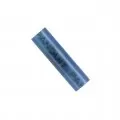
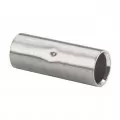
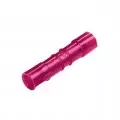
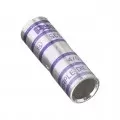
1. What is a Butt Splice
A butt splice is a type of wire connector that is used to join two wires end-to-end in a secure and permanent manner. It is designed to create a reliable electrical connection by ensuring continuity and conductivity between the wires. Butt splices are typically made of metal, such as copper or aluminum, and feature an insulating covering to protect against electrical shocks and prevent short circuits.
2. Applications of Butt Splices
Butt splices find applications in various industries and electrical projects. They are used in automotive wiring for harnesses, repairs, and extensions. In electrical installations, butt connectors join wires during the installation of outlets, switches, and lighting fixtures. Industrial settings utilize butt splices for wiring machinery and control panels. Marine, aerospace, and DIY projects also benefit from the secure connections provided by butt splices.
Tools Needed for Crimping a Butt Splice
Having the right tools for crimping butt splices is essential to achieve reliable connections. Here are the tools you'll need:
1. Wire Stripper
A wire stripper is a specialized tool designed to remove the insulation from the ends of the wires. It typically has multiple cutting and stripping slots for different wire sizes. Choose a wire stripper that matches the gauge of the wires you are working with to ensure clean and precise stripping.
2. Crimping Tool
A crimping tool, also known as a wire crimper, is specifically designed to create a secure connection between wires and a butt splice. It features a built-in mechanism that compresses the metal sleeve of the butt connector onto the wires, creating a strong and reliable connection. Crimping tools come in various sizes and designs, so select one that is suitable for the wire gauge and type of butt splice you are using.
3. Heat Gun
A heat gun is an essential tool for activating the adhesive inside the butt splice and creating a sealed connection. It emits a controlled stream of hot air that evenly distributes heat to the butt splice, causing the insulation to shrink and adhere tightly to the wires. When using a heat gun, ensure that it has adjustable temperature settings to prevent overheating and damaging the wires or insulation.
How to Crimp a Butt Splice Connectors in 5 Steps
Properly crimping a butt splice requires a systematic approach. Follow these 5 steps for a successful crimping process:
Step 1: Strip the Wires
Use a wire stripper to remove approximately 1/2 inch of insulation from the ends of the wires. Place the wire into the appropriate slot on the stripper, squeeze the handles, and rotate the stripper around the wire to cleanly remove the insulation. Be careful not to nick or damage the wire strands during this process.
Step 2: Insert the Wires into the Butt Splice
Insert the Wires into the Butt Splice: Insert one stripped wire into each end of the butt splice, ensuring they are fully inserted. The wires should extend all the way into the butt splice, making contact with the metal interior. Make sure the wires are aligned properly to ensure a secure connection.
Step 3: Crimp the Butt Splice
Crimp the Butt Splice: Position the butt splice in the crimping tool's designated slot for butt splices. Squeeze the handles firmly to compress the metal sleeve onto the wires. The crimping tool will apply enough pressure to create a gas-tight connection between the wires and the butt splice. Ensure that the crimp is secure and there are no loose strands.
Step 4: Test the Connection
After crimping, gently tug on the wires to ensure they are tightly held by the butt connector. A properly crimped connection should be strong and hold the wires firmly in place. If the connection feels loose, crimp the butt splice using the appropriate crimping tool.
Step 5: Apply Heat to the Butt Splice Connnectors
Use a heat gun to apply heat evenly to the butt splice, shrinking the insulation and creating a sealed and durable connection. Hold the heat gun about 2-3 inches away from the butt connector and move it in a circular motion to distribute the heat evenly. Be cautious not to overheat the butt splice, as excessive heat can damage the wires or insulation.
Troubleshooting Common Issues with Butt Splices
Even with proper technique, issues may arise during crimping. Here are two common problems and their solutions:
Issue 1: Loose Connection
If the connection feels loose after crimping, it may indicate insufficient pressure applied during the crimping process. To fix this, crimp the butt splice ensuring a tighter grip on the wires. Use the appropriate crimping tool and apply enough pressure to create a secure and tight connection.
Issue 2: Overheating
Overheating the butt splice can cause damage to the wires or insulation. To prevent this, ensure you use a heat gun with adjustable temperature settings. Start with a lower heat setting and gradually increase if needed. Keep the heat gun moving to avoid concentrated heat in one spot. If you notice signs of overheating, such as melted insulation or discoloration, trim the affected area and crimp the butt splice.
Safety Precautions When Crimping a Butt Splice
When working with electrical connections, safety should be a top priority. Please pay great attention to the following precautions:
- Always work with the power turned off to avoid electrical shocks. Ensure the circuit is de-energized by switching off the appropriate breaker or removing the fuse.
- Wear safety goggles to protect your eyes from any debris that may be generated during the crimping process.
- Use insulated gloves to protect your hands from potential electrical hazards.
- Ensure proper wire size and compatibility with the butt splice to prevent any issues. Using the wrong size of butt splice or wire gauge can lead to unreliable connections or potential damage.
Difference between ring terminal and butt splice connectors
Though they are both used in aircraft electrical systems, butt splice connectors and ring terminals are not for the same applications.
Butt splice connectors are used for connecting two wires.
In contrast, ring terminals are utilized to terminate.
Butt splice connections and ring terminals require separate installation procedures. Most of them require a crimping tool. You must first peel the insulation from the wires before crimping butt splice connectors or ring terminals onto them.
To connect a ring terminal to a piece of equipment, you normally need to insert a screw through the ring-shaped aperture.
Explore more connectors here.
Final Verdict
Develop the essential skill of crimping butt splices to establish secure and reliable wire connections. Follow a detailed step-by-step process, gain troubleshooting insights, and prioritize safety precautions to ensure optimal electrical performance. Master this technique for confident and efficient electrical work.
Disclaimer: The views and opinions expressed by individual authors or forum participants on this website do not represent the views and opinions of Chipsmall, nor do they represent Chipsmall's official policy.

share this blog to: