


OUTLINE:
How to Crimp Flag Terminals [5 Minutes]
 603
603Embarking on electrical projects often involves mastering essential skills, and one such fundamental technique is crimping flag terminals. Whether you're a seasoned electrician or a DIY enthusiast, the ability to properly crimp flag terminals is a valuable skill that ensures secure and efficient electrical connections.
In this guide, we'll delve into the art of crimping flag terminals, exploring the techniques, tools, and best practices to achieve reliable and professional results.
Join us on this journey as we demystify the crimping process and empower you to elevate your electrical projects with precision and confidence.
An Overview: What Are Flag Terminals
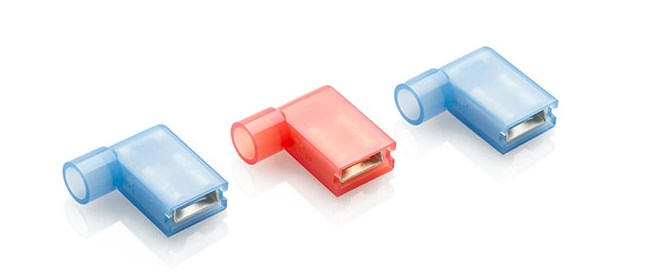
Flag terminals are electrical connectors with a distinctive flat tongue, facilitating easy crimping onto wires for secure connections. Available in various sizes, they accommodate different wire gauges and often include insulation support for added protection.
Widely used in automotive wiring, electrical panels, and industrial settings, flag terminals offer efficient and organized wire connections.
Their flat design aids in quick identification, and depending on the application, they can be connected to terminal blocks, screw terminals, or receptacles.
Overall, flag terminals are versatile connectors crucial for reliable electrical connections in diverse environments.
Quick Guide: How to Crimp Flag Terminals
Crimping flag terminals is a straightforward process when you follow these quick steps:
1. Choose the Right Terminal:
Select the appropriate flag terminal size that matches the wire gauge for a secure fit.
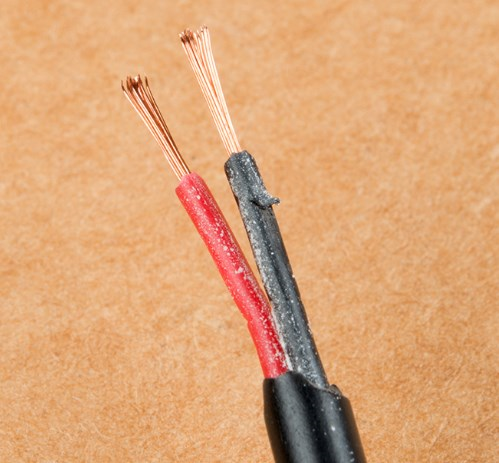
2. Strip the Wire:
Strip the insulation off the end of the wire to expose the bare conductor. Ensure the stripped length matches the terminal requirements.
3. Insert the Wire:
Insert the stripped end of the wire into the flat portion of the flag terminal, ensuring it reaches the crimping area.
4. Position in Crimping Tool:
Place the flag terminal and wire into a suitable crimping tool. Position it so that the crimping jaws cover the crimping area of the terminal.
5. Crimp Securely:
Squeeze the crimping tool handles firmly to compress the terminal around the wire. Apply enough pressure to create a secure and tight connection.
6. Inspect the Crimp:
After crimping, visually inspect the connection to ensure the terminal is securely attached to the wire without any damage.
What Tools Are Used for Crimping Flag Terminals
Crimping flag terminals requires the use of specialized tools designed to ensure a secure and reliable connection. Here are the key tools commonly used for crimping flag terminals:
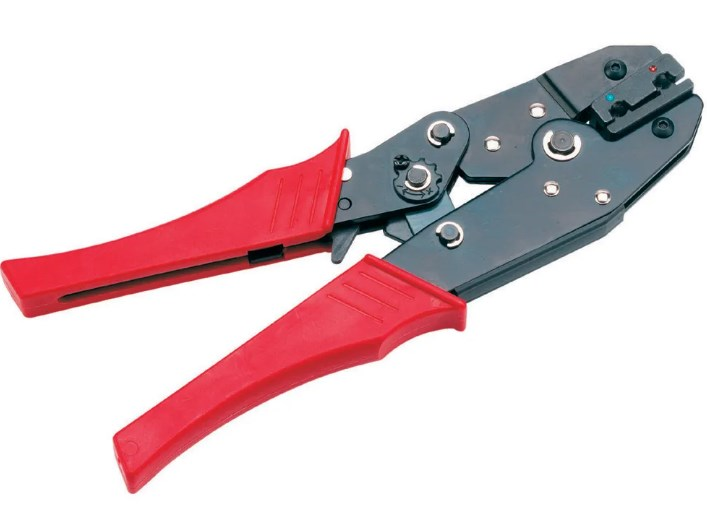
- Flag Terminal Crimping Tool:
A dedicated crimping tool designed specifically for flag terminals is essential. These tools have jaws or dies that match the unique shape and dimensions of flag terminals, providing a proper fit for precise crimping.
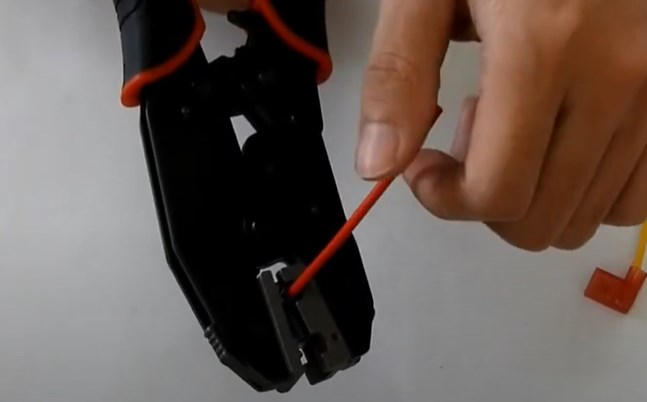
- Wire Stripper:
Before crimping, a wire stripper is used to remove the insulation from the end of the wire. This exposes the bare conductor, allowing for a proper connection with the flag terminal.
- Crimp Dies or Jaws:
Depending on the design of the crimping tool, additional crimp dies or jaws may be required.
These components ensure that the crimping process is tailored to the specific dimensions of the flag terminal.
- Adjustable Crimping Tool (Optional):
Some crimping tools come with adjustable settings, allowing users to accommodate various wire gauges and terminal sizes. This flexibility enhances versatility for different applications.
- Terminal Positioning Tool (Optional):
In certain cases, a terminal positioning tool may be used to ensure proper alignment of the flag terminal within the crimping tool, aiding in achieving accurate and consistent crimps.
- Inspection Tools:
After crimping, inspection tools such as magnifying glasses or microscopes may be used to closely examine the crimped connection for any signs of irregularities or defects.
What Can I Use if I Don't Have A Crimping Tool
If you don't have a crimping tool, there are alternative methods to make electrical connections, although they may not be as secure or reliable as using a dedicated crimping tool. Here are some alternatives:
- Needle-Nose Pliers:
Needle-nose pliers can be used to manually crimp the terminal onto the wire.
While it may not provide the same precision and force as a crimping tool, it can work for lighter applications.
- Vise or Hammer:
Placing the terminal and wire on a stable surface and using a vise or hammer to compress the terminal can be an option.
However, this method requires caution to avoid damaging the wire or terminal.
- Soldering:
Soldering the wire to the terminal is an alternative method. This creates a secure connection, but it may not be suitable for all applications, especially those involving flexibility or frequent disconnections.
- Twisting and Taping:
In cases where a crimping tool is unavailable, twisting the wire and terminal together and securing them with electrical tape can provide a temporary solution.
However, this is not recommended for long-term or high-stress applications.
Flag Terminal Crimping Specifications
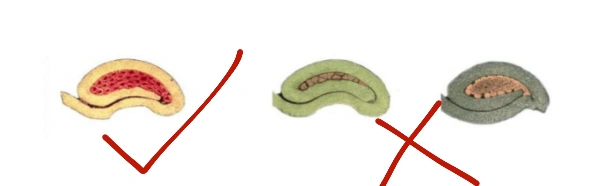
Core wires must be visible. The end of the core wire must extend beyond the crimping point of the core wire, and the excess part must not affect the assembly function of the terminal, that is, it cannot extend into the contact area of the terminal.
The crimping point of the plastic wire must ensure that the end of the plastic wire and the core wire are visible at the same time.
No single conductor is allowed to be exposed or damaged.
The End
In summary, delving into the world of crimping flag terminals offers beginners a fundamental skill set for navigating electrical projects with confidence.
As we've explored the steps, tools, and techniques, it becomes evident that this skill is not just about making connections; it's about empowering enthusiasts to contribute meaningfully to their DIY endeavors.
Whether utilizing a dedicated crimping tool or exploring alternative methods, the key lies in understanding the process and ensuring the creation of secure and reliable electrical connections.
This proficiency extends beyond the immediate task at hand, providing beginners with the foundation for tackling more complex projects in the future.
For novices, the journey of crimping flag terminals is an opportunity to gain hands-on experience in organizing wiring within control cabinets, contributing to electronics projects, and fostering a deeper understanding of electrical craftsmanship.
The simplicity of the process, when coupled with the right tools and attention to detail, allows beginners to take significant strides in their capabilities.
In the hands of a beginner, crimping flag terminals transforms from a technicality to a tangible skill that opens doors to creativity and problem-solving.
Therefore, embrace the learning process, practice diligently, and let the secure connections you create stand as evidence of your growing expertise in the ever-expanding world of electrical DIY projects.
Happy crimping!
Disclaimer: The views and opinions expressed by individual authors or forum participants on this website do not represent the views and opinions of Chipsmall, nor do they represent Chipsmall's official policy.

share this blog to: