


OUTLINE:
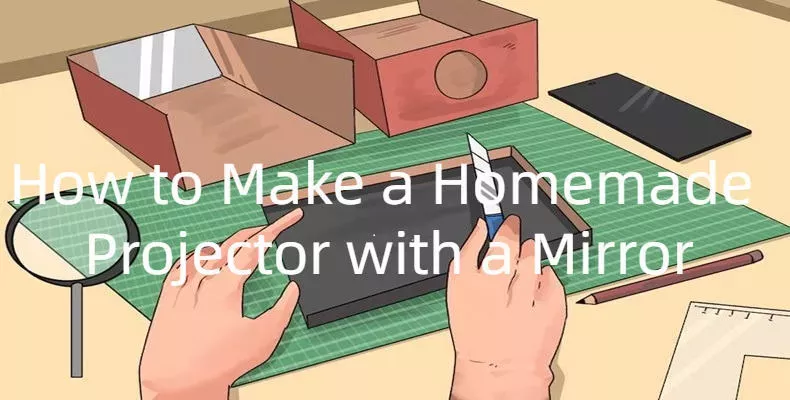
How to Make a Homemade Projector with a Mirror
 178
178Have you ever imagined you could enjoy movies on a large screen at home, just like you're in a movie theater? Here, with just a mirror and several simple things that you already have at home Let's see how we can get it done!
Tools Needed for a Homemade Projector
Before we actually get down to the tutorial, here's what we need to prepare beforehand:
1. Shoebox or Any Cardboard Box
A shoebox would be perfectly fine. In case there aren't any at your house, any cardboard
box as the size of a shoebox could be another option.
2. Magnifying Glass or Camera Glass
The magnifying glass should be preferably with a diameter of 3 inches or more. If you can't find one, camera glass would be could okay. You can also buy one at a store or snag one online.
3. Tablet or Smartphone
Any functioning tablet or smartphone will do. It will be the source of the video that we are going to play.
4. Glue or Adhesive Putty
Glue or adhesive putty will be used to stick materials together and improve stability where necessary.
5. Tape
6. Scissors
Scissors are indispensable to cut the box and other materials into the right shapes.
7. Mirror
The mirror should be a 4x4 square one.
- Black Paint or Black Paper
Black paint or black paper is going to be a lightproof compartment inside the box.
Once you have gathered all of the necessary materials, you are halfway to success. With a bit of patience and creativity, let's get to our step-by-step tutorial.
Steps to Make a Homemade Projector
The tutorial is going to be simple and easy to follow with a bit of patience and creativity. I'll give you step-by-step instructions. Let's get started!
Step 1: Prepare the Cardboard box
First, let's cut a hole in one side of the cardboard box. The hole should be slightly larger than the magnifying glass's diameter. This hole will be the lens's placement area.
Step 2: Install the Magnifying Glass
Now, position the magnifying glass in the hole we just made. Use some glue or tape to secure it in place. Make sure the magnifying glass is well-centered and doesn't move around.
Step 3: Create the Smartphone Holder
To hold your smartphone or tablet, cut out a small piece of cardboard that fits the device's size. Please attach it to the box's opposite side, positioning it directly across from the magnifying glass. This setup ensures the light from the screen passes through the lens correctly.
Step 4: Prepare the Light-Sealed Compartment
Here comes the creative part! Paint the inside of the cardboard box black or use black paper to line it. This step prevents outside light from interfering with the projected image, resulting in a more transparent and sharper display.
Step 5: Prop Up the Mirror
Place the mirror at a 45-degree angle inside the box. It should be positioned to catch the light coming through the magnifying glass and reflect it forward. The mirror is crucial for redirecting the image and making it project onto a screen or wall.
Step 6: Testing
Now that we've assembled the components, it's time for the moment of truth! Find a dark room and turn on your smartphone or tablet. Adjust the box's position and the mirror's angle until you see the image projected clearly onto a nearby surface.
Step 7: Adjust the Image
Play around with the focus by moving the smartphone or tablet closer to or farther away from the magnifying glass. Experiment until you achieve the desired sharpness and clarity of the projected image.
Step 8: Make It Stable
For a hassle-free movie night or presentation, reinforce the cardboard box's stability by securing any loose parts with extra tape or glue.
[Must know] Tips for Using a Homemade Projector
Here are some tips you need to pay attention to in order to have better a visual experience.
1. For better visibility, the homemade projector should be used in a dimly lit environment. The projector can also be used during the day, but don't forget to draw the curtains in your room.
2. Optimize image clarity and reduce glare by adjusting room lighting and viewing angles. This ensures a comfortable viewing experience.
3. Since the mirror can reflect surroundings onto the projection screen, use the projector in a low-traffic area or a private room for optimal privacy.
Final Verdict
DIY A homemade projector requires a bit of patience and creativity. It may seem trivial while we can simply order a projector online and wait until it is delivered to our doorstep, but the joy of successfully making a homemade one with your own hands is worth the time and work. Now gather your friends and get your popcorn and snacks ready, and enjoy a nice movie with the homemade projector!
Disclaimer: The views and opinions expressed by individual authors or forum participants on this website do not represent the views and opinions of Chipsmall, nor do they represent Chipsmall's official policy.

share this blog to: