OUTLINE:
How to Replace Speakers in Car
 448
448Changing your car speakers can improve the sound quality, making the listening experience more engaging and enjoyable. This article will show you how to replace car speakers, including how to ensure safety, what tools and parts you need, and a step-by-step guide to ensure the job goes smoothly. It will also answer common questions and give you advice to help you get the best results.
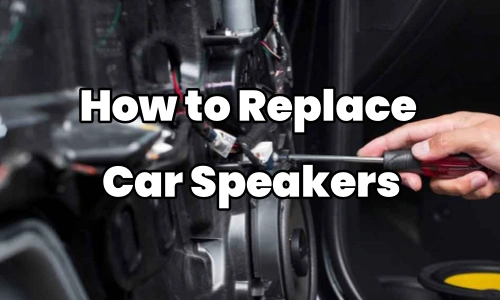
Image Source: dubizzle
Safety Preparations Before Replacing Car Speakers
To keep yourself and your car safe from electrical dangers and damage during the speaker replacement process, it's important to take the following safety steps before you start:
Disconnect the Battery
Take the battery out of your car every time you park it so the electronics don't get shocked or broken. This step is very important as a safety measure and to protect your car's electronics.
Put on Safety Gear
Wear gloves to protect your skin from sharp parts or sharp tips that could hurt you. This safety step is very important when working with door panels and other parts that are easy to break.
Label and Keep Track of Components
You should name and track all the inside parts you remove during the process. This will simplify putting everything back together correctly after the process is done.
Tools Required for Car Speaker Replacement
You need several tools to replace car speakers to ensure the process goes smoothly and quickly. Here is a full list of the most important tools you will need:
Phillips Screwdriver
To remove the screws on the door panels and the grills of the tweezers, one requires a Phillips tool. Such a tool is meant to be used on Phillips-head screws typical of car bodies to screw and unscrew the metallic member into and out of the car body.
Flat-Head Screwdriver
A flat-head screwdriver is sufficient to undo/redo the panels and screens of any device. This tool is flexible when dealing with small parts because its blade can cut, shave, and pry items apart.
Magnetic Driver for Screws
It is most advantageous to use the magnetic screwdriver when you want to remove screws that are a little hard to reach, like in between walls or even cracks. It is thus possible to fix the location of the claws of the sticky head under the screws so that they are not misplaced.
Torx Drivers and Bits
It is a known fact that inside cars frequently employ Torx screws. Therefore, having the right torx tools and bits will make your work easier and, most importantly, reduce stress. These screws must fit these tools to ensure that there is a tight and positive engagement.
Drill with Screwdriver and Bits
A drill with a screwdriver and bits can help if you need to make holes. You can use this tool to create new mounting places for speakers or change the ones you already have. Always use drill bits that are made for the object you are working with.
Allen Wrenches
To tighten or loosen screws with Allen's heads, you need an Allen wrench. A certain kind of wrench is required to tighten these screws, which are often used inside cars.
Set of Socket Wrench
To remove nuts and bolts, you need a socket wrench set. This set has sockets for different sizes and types of fasteners, making it suitable for car care or repair.
Cutters and Strippers for Wire
You need a wire cutter and stripper to cut and strip speaker lines. This tool makes connecting the wires to the speakers easy and ensures that they are cut straight and stripped to the right length.
Solder and a soldering iron
You will need a soldering iron and solder to make links if necessary. This tool allows you to safely join wires and make a working link.
Making a Crimping Tool
A crimping tool can be used to make links if you don't want to join. They can use this tool to securely connect lines to connectors or other parts.
Tape for electricity
It also assists in holding the positions of the lines and the connections as a whole. It surrounds wires and ensures the safety of the connection mainly because it offers an insulating layer.
The following fundamental equipment can be used to perform a successful and efficient car speaker replacement. You must also ensure safety and sufficient time to connect and properly route all the cords.
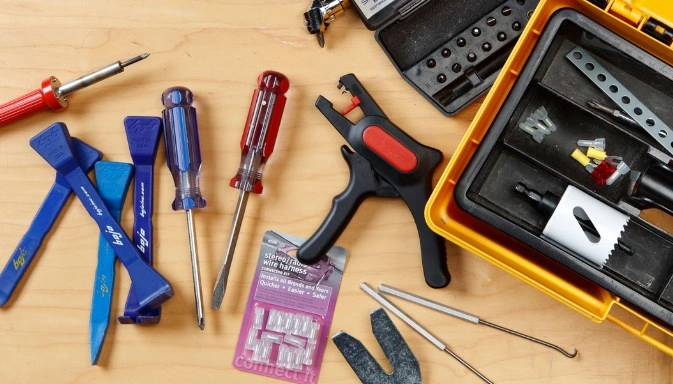
Image Source: Crutchfield
Car Speaker Parts Required
In addition to the tools, you will need the following parts to complete the speaker replacement:
New Speakers
Ensure the speakers you want to purchase fit your car and can meet your sound demands. Ensure that they screw in the holes of your car’s speakers, or use speaker clamps where you need to.
Speaker Wire
Purchase speaker wire in 18 AWG, 16 AWG, or 14 AWG, depending on the length of the speakers and required power. The sizes of the cables to be used in subwoofers are 16-gauge, 14-gauge, or 12-gauge wires.
Wiring Harness
These new speakers come with a wiring harness; you must connect this harness to the one already installed in your car. You must also solder or crimp the other joints.
Speaker Brackets
Second, you will need speaker brackets if your new speakers don’t fit into these holes in your car’s speakers. These come in different sizes, such as 6. There is text on the particular sizes of the papers, including 5"x 8", 6"x 9", 5"x 7", and 6"x 8".
Subwoofer (Optional)
If you want to add a subwoofer to your car to improve the bass, ensure the amplifier works with your vehicle.
Step-by-Step Guide to Replacing Car Speakers
Changing your car speakers can be a fun, do-it-yourself job that can improve the sound quality of your car. By following this thorough, step-by-step guide, you can ensure that the process of replacing the speakers goes smoothly and quickly.
Step 1: Disconnect the Battery
Locate the Battery
Find the battery in your car as the first step. The location may be different based on the make and model of your vehicle, but it is usually in the engine bay.
Disconnect the Negative Terminal
Take a wrench and loosen the battery's negative connection. This will disconnect the battery from the car's electrical system. This is very important for your safety and to keep the electronics from getting damaged during the repair.
Remove the Negative Cable
Remove the negative wire from the battery terminal very carefully. Keep it away from metal objects so that it doesn't short-circuit accidentally.
Step 2: Remove the Door Panels
Pry Off the Door Panels
Find the door panels and carefully pry them off with a flat-head screwdriver. Be careful not to damage the panel or the inside of the door. Start at the sides and work your way around it.
Remove the Screws That Hold It in Place
Once the door panel is free, look for any screws that are holding it in place. Use the right screwdriver, like a Phillips or Torx tool, to take these screws off.
Loosen the Panel
Now that the screws are out, you can slowly pull the door panel away from the door. Pay attention to any wires or parts that may still be attached to the panel, and carefully separate them.
Step 3: Remove the Old Speakers
Remove the Speaker Screws
Find the screws holding the old speakers in place and use the right screwdriver to take them off.
Remove the Speaker Wires
Carefully remove the wires that are attached to the old speakers. Write down where the wires were linked. This will help you when you put the new speakers in.
Remove the Old Speakers
Carefully take the old speakers off the door now that the screws are gone and the wires are cut.
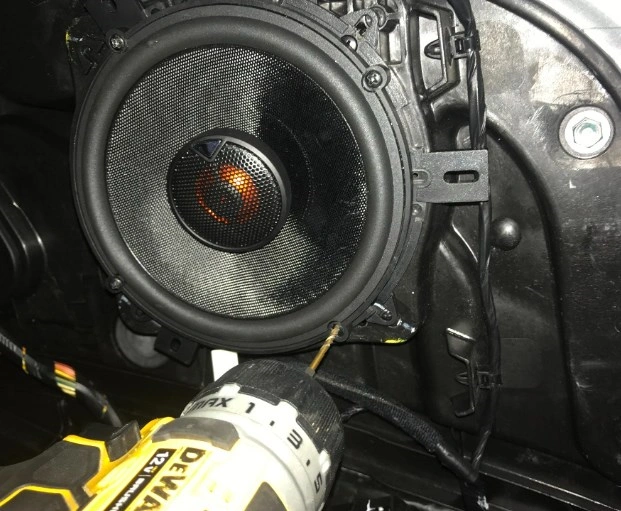
Image Source: alphamedicalmanagement.com
Step 4: Install the New Speakers
Place the New Speakers
Line up the mounting holes on the new speakers with the holes in the door. Ensure the speakers are in the right place and facing the right way.
Put the Speakers in Place
To put the new speakers in place, use the screws that came with them or the ones you took off the old ones. Make sure the screws are tight but don't tighten them too much.
Connect the Wires to the Speakers
Join the new speakers' lines to the car's wiring harness. If your new speakers came with a wiring kit, use that to connect the wires. They might need to be soldered or crimped if they don't.
Step 5: Reconnect the Battery
Reconnect the Negative Cable
Carefully reconnect the negative cable to the battery connector using a wrench to ensure it stays in place.
Tighten the Terminal
Double-check that the negative terminal is adequately tightened to ensure the link is safe.
Step 6: Test the Speakers
Turn on the radio
Start your car and turn on the radio to test the new speakers.
Check the Operation of the Speakers
Play different audio sources through the new speakers and listen for problems, like distortion or a lack of sound.
Change the Sound Settings
If you need to, change the sound settings on your car's radio system to get the best sound quality for you.
Step 7: Reassemble the Door Panels
Replace the Door Panels
Carefully put the door panels back where they belong, ensuring all the parts are lined up correctly.
Protect the Panels
To keep the door panels in place, put the screws back in place.
Make Sure It's Aligned Right
Check again to ensure all the parts are lined up correctly, and the door panels are safely in place.
Step 8: Final Checks
Inspect the Wiring
Carefully look over all the wiring connections to ensure they are tight and that the wires are properly handled. Make sure there are no loose or exposed wires.
Check the Speaker Seating
Ensure the new speakers are in the door correctly and securely in place.
Test the Speakers Again
Once more, turn on the radio and check the speakers to ensure they work properly and provide the sound quality you want.
By strictly observing the following procedures, the reader can change the car's speakers and get better sound. It’s important to note that we should be patient, careful, and, most of all, safety-conscious throughout the process. If, for some reason, you have difficulties or have more questions, it is advisable to contact a specialist or to read the automobile service manual more thoroughly.
Tips
Speakers are substantially mobile, especially when the sound being produced is loud. If not well tightened, there is a likelihood that the entire system will be damaged; ensure, therefore, that all screws and links are properly connected.
Ensure that the speakers you are planning to install work well with the car’s radio system to avoid issues with sound and or destruction of some other parts within your vehicle.
This is especially true if you are conversant with the various connections. If you doubt how to connect the new speakers to other electronics in your house, you should consider hiring an expert to install them.
FAQs
Do I need special tools to replace car speakers?
Screwdrivers, panel removal equipment, and possibly wire cutters, depending on the type of vehicle, are usual tools for the job.
How do I know if my car speakers need replacing?
These include distorted sound, rattling, or no sound from the speaker. This is due to age and wear, which also contribute to the material's composition.
Can I replace the car speakers, or should I hire a professional?
Many people can replace speakers themselves with some research. Hiring a professional ensures correct installation.
Will replacing car speakers affect my vehicle's warranty?
In most cases, replacing the speakers will not begin the clock on your warranty. Aggravating the situation can damage other parts during installation.
What should I consider when choosing new car speakers?
This may be in size compatibility, power handling, sensitivity, and general sound quality that is preferable for that vehicle.
Conclusion
If you renew your car speakers, the sound will be much better, making listening more interesting and fun. Following the step-by-step instructions and using the right tools, you can change your car speakers and enjoy better music quality. Always put safety first, and take your time to make sure the fix works and is safe. You can enjoy your better car stereo after having it installed by a pro if you know how to replace your car speakers and have the right tools.

Disclaimer: The views and opinions expressed by individual authors or forum participants on this website do not represent the views and opinions of Chipsmall, nor do they represent Chipsmall's official policy.

share this blog to:


