


OUTLINE:
For Beginners: How to Test my HVAC Blower Motor
 67
67If your HVAC system is not blowing enough air, the problem may be with the blower motor. Testing the hvac blower motor is a crucial step in identifying the root cause of the problem. It is necessary to determine whether it is faulty or if there is a problem elsewhere.
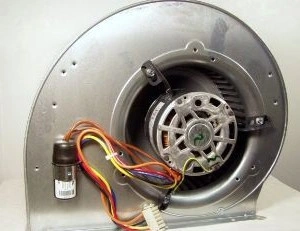
Image Source: Heating Air Conditioning
This guide is designed for beginners, so if you are new to HVAC maintenance, don't worry. We will take you through the testing process step by step, telling you what tools are needed, how to check the motor, and what signs indicate that there is a problem with the motor. By the end, you will have a clearer understanding of how to troubleshoot and may even fix the blower motor yourself, allowing your HVAC system to run smoothly again. Let's get started!
What Is A HVAC Blower Motor
An HVAC blower motor is what keeps the air moving in your heating and cooling system. It powers the fan that pushes warm or cool air through your vents, helping to keep your home comfortable year-round.
There are two main types: single-speed motors, which run at one constant speed, and variable-speed motors, which adjust based on your home’s needs for better efficiency. If your HVAC system isn’t blowing air properly or your home feels unevenly heated or cooled, the blower motor could be the culprit. Regular maintenance and troubleshooting can help keep it running smoothly and your system working at its best!
Tools for Testing HVAC Blower Motor
Testing your HVAC blower motor requires a few essential tools to ensure accurate troubleshooting. Here’s what you’ll need:
- Screwdriver Set – To remove panels and access the blower motor.
- Multimeter – To check for voltage, continuity, and resistance in the motor and wiring.
- Non-Contact Voltage Tester – To safely detect live electrical connections before working.
- Clamp Meter – To measure the motor’s current draw and detect overload issues.
- Nut Driver Set – For loosening or tightening nuts and bolts securing the motor.
- Needle-Nose Pliers – To handle small wires and connectors safely.
- Flashlight or Work Light – To clearly see inside dark or hard-to-reach areas.
- Replacement Capacitor (Optional) – If testing reveals a faulty capacitor, having a spare can help with quick repairs.
Step by Step Guidance for Testing HVAC Blower Motor
If your HVAC system is not blowing properly, it may be due to a problem with the HVAC blower motor. Follow these steps to safely detect and diagnose issues.
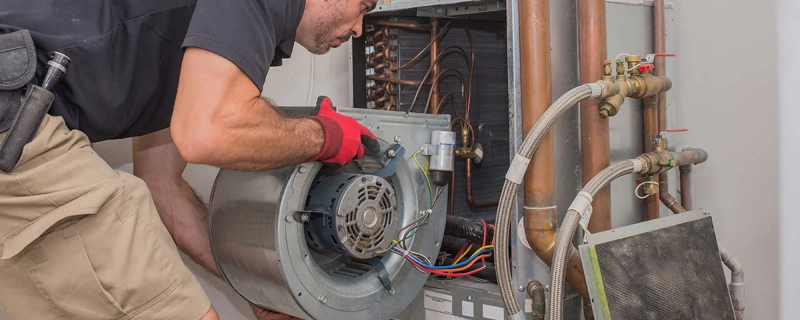
Image Source: The furnace outlet
Step 1: Turn Off the Power to the HVAC System
Locate the circuit breaker and turn off power to the HVAC unit.
Use a non-contact voltage tester to confirm the power is completely off before proceeding.
Step 2: Locate the Blower Motor
Use a screwdriver or nut driver to remove the HVAC maintenance panel.
Find the blower motor, typically located near the air handler or furnace.
Step 3: Perform a Visual Inspection
Check for dust buildup, loose wires, or a burnt smell, which could indicate a problem.
Inspect the motor capacitor—if it’s bulging or leaking, it may be faulty and could affect motor performance.
Step 4: Measure the Power Supply
Set the multimeter to AC voltage mode.
Check the motor’s wiring terminals for proper voltage.
If no voltage is detected, the issue may be with the thermostat, control board, or wiring.
Step 5: Test Motor Continuity
Set the multimeter to continuity or resistance mode (Ω).
Place the probes on the motor’s wiring terminals.
A reading of zero or infinite resistance indicates a faulty motor that needs replacement.
Step 6: Check the Capacitor
Disconnect the blower motor capacitor (ensure power is off first!).
Set the multimeter to capacitance mode and check the reading.
If the capacitance is lower than the rated value on the capacitor label, replace it.
Step 7: Measure the Motor’s Current Draw (Optional but Recommended)
Use a clamp meter to measure the current on one of the motor’s power wires.
Compare the reading to the motor’s specifications (found on the label).
A higher-than-normal amp draw may indicate a motor malfunction or airflow obstruction.
Step 8: Manually Spin the Blower Wheel
If the motor is off but doesn’t spin freely, the bearings may be worn.
If it spins freely but still won’t run, there may be an electrical issue.
Step 9: Check the Thermostat & Control Board (If Necessary)
If the blower motor is not receiving power, inspect the thermostat settings and wiring.
Look for burnt or damaged connections on the control board.
Step 10: Determine Whether to Repair or Replace
If the motor fails the power, continuity, or capacitor tests, it likely needs replacement.
If the issue is with the thermostat, wiring, or control board, further repairs may be needed.
How to Test your HVAC Blower Motor with Multimeter
If the hvac blower motor (the heating and cooling system at home) is not working, don't worry, a multimeter can help you see where the problem is. Come on, follow these steps and let's safely give it a "medical examination" to see if it needs to be repaired or replaced with a new one.
Step 1: Power off first
Find the switch that controls HVAC, click it and turn it off.
Use another small tool, the one that can measure electricity without touching the wires, to confirm that it is really out of battery before proceeding to the next step.
Step 2: Find where the motor is hidden
Pick up a screwdriver or the small tool that tightens the nut and disassemble the HVAC casing.
Look, the blower motor is usually located next to the box or stove that processes the air.
Step 3: Check if there is electricity
Set the multimeter to the gear for measuring the AC power at home.
Then, touch the power connector of the motor with the two "little tentacles" of the multimeter.
If the reading is similar to the voltage written on the motor (such as 120V or 240V), it means that the power is on.
If there are no readings, it could be due to the thermostat, control panel, or wiring.
Step 4: Check if the motor is connected or not
Set the multimeter to the gear where it cannot be tested.
Use those two 'little antennae' to touch the wire ends of the motor.
If the displayed resistance is very small (just a few ohms), it means that there is a current inside the motor.
If it shows 0 or infinity, oh my, the motor may need to be replaced.
Step 5: Measure the capacitor (if any)
First, unplug the small plug of the capacitor next to the motor (remember to cut off the power first).
Set the multimeter to the capacitance measurement mode.
Then, check if the number displayed on the multimeter is similar to the number written on the capacitor.
If there is too much difference, the capacitor also needs to be replaced.
Step 6: Check if the grounding is good
Still adjust the multimeter to the gear where it cannot be tested.
One "little tentacle" can be placed on the motor casing, while the other can be placed on any metal part of the HVAC system.
If the multimeter beeps or displays a low resistance, it means that the grounding is good.
If there is no response, it may be a grounding problem.
Step 7: Draw a conclusion
If the voltage, connectivity, and capacitors have all been checked and there are no issues, but the motor still does not rotate, it may be due to damage inside the motor or worn bearings.
If the motor fails any test, it will probably have to be replaced with a new one.
The Issues while Testing HVAC Blower Motor[Pay Attention]
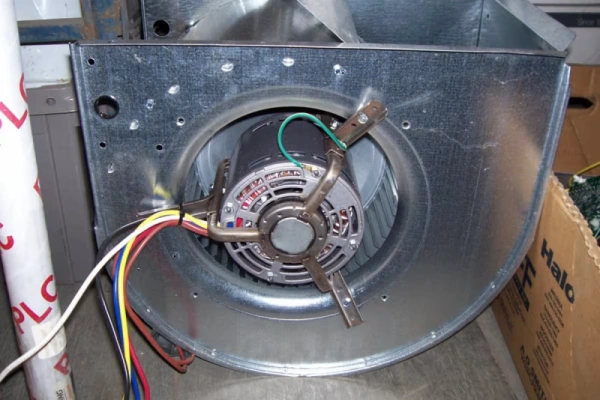
Image Source: Homeguide
When testing your HVAC blower motor, there are several common issues and safety concerns to watch out for. Here’s what to keep in mind:
1. Forgetting to Turn Off Power
- Always switch off the circuit breaker before testing.
- Use a non-contact voltage tester to confirm power is completely off.
2. Misreading the Multimeter
- Ensure your multimeter is set to the correct mode (AC voltage, resistance, or capacitance).
- Incorrect settings can lead to false readings or even damage your multimeter.
3. Overlooking a Faulty Capacitor
- A blown or weak capacitor can mimic motor failure.
- Always check the capacitance reading—if it’s lower than the rated value, replace the capacitor.
4. Ignoring Loose or Burnt Wires
- Loose or corroded connections can prevent the motor from running properly.
- Look for burn marks, melted insulation, or disconnected wires.
5. Not Checking the Airflow Path
- A blower motor struggling with dust buildup or blocked vents may seem faulty when it’s just obstructed.
- Clean the blower wheel, air filters, and ducts before assuming the motor is bad.
6. Overlooking Bearing Wear
- If the motor hums but doesn’t spin, try rotating the blower wheel manually.
- If it’s stiff or noisy, the bearings may be worn out, requiring motor replacement.
7. Skipping Thermostat & Control Board Checks
- If the blower motor isn’t getting power, the issue might not be the motor itself.
- Inspect the thermostat, relay, and control board connections for faults.
Final Verdict
Testing your HVAC blower motor doesn’t have to be complicated. By following these step-by-step guidelines, you can safely diagnose common issues using a multimeter and basic tools. Whether it’s a power issue, faulty capacitor, or worn bearings, proper testing helps you determine whether to repair or replace the motor. Regular maintenance and early detection can keep your HVAC system running efficiently, ensuring comfort in your home.
Disclaimer: The views and opinions expressed by individual authors or forum participants on this website do not represent the views and opinions of Chipsmall, nor do they represent Chipsmall's official policy.

share this blog to: